Nothing was trendier in 2012 than cake on a stick. Except for maybe bacon. But really, bacon is a staple food in every year. This year cake pops or cake on a stick or cake balls were all the rage. Even I made them! Usually my cooking is limited to old favourites or traditional can’t-go-wrongs, but this year I went wild to try to make a few occasions extra special. I taught myself how to make cake pops, and darnit if I didn’t do a great job! I encountered a few obstacles along the way (burnt chocolate, melting cake) but by the third batch I think I had it down pretty well.
If you’re digging what you’re seeing, here are my 10 easy to follow steps to make this year’s trendiest treat!
Step 1: Buy a cake mix in a box – don’t be a hero and make one from scratch, that’s just nonsense.
Step 2: Make the cake mix, bake it and everything (follow the instructions on the box). Once these are done, let them cool – you’re going to be crumbling up the cakes anyway so while they are cooling you can break them up a bit to make the process faster.
Step 3: Once your cakes are cooled, crumbled them into very small bits (cake dust, if you will) into a bowl.
Step 4: Add a heaping tablespoon of frosting (again, go Betty Crocker, no need to get fancy). Mix this into the cake crumble with your hands. Go light on the icing at first and add more as needed. I have found that you only need one blob of icing to do the trick. The box cakes are already very moist because of the oil and eggs. If the cake gets too wet at this point (too much icing) the balls won’t hold (you’ll need to bake another cake to save yourself if this happens). You need just enough icing until the cake will hold its shape when squeezed together (this is why it’s best to mix with your hands – think packing snow).
Step 5: Make a ton of balls. I find that once decorated the balls get a fair amount larger so I like to make smaller balls (just a bit smaller than a ping pong ball). I can usually make about 30 balls per box o’ cake.
Step 6: Stab a stick into each ball, using a bit of melted chocolate on the ends to glue them in place.
Step 7: Put everything in the freezer for 20 minutes.
MEANWHILE: Prepare your chocolate. Melt chocolate in a double boiler on a very low heat (too hot and it will make the chocolate too thick – I’ve added a very tiny splash of oil to keep the chocolate liquidy). Set out any decorations you want to use in a little bowls or whatever works best for you (sprinkles, etc). I also like to use a smaller pot for the chocolate so that it is deeper, so I can submerge the whole pop into the chocolate.
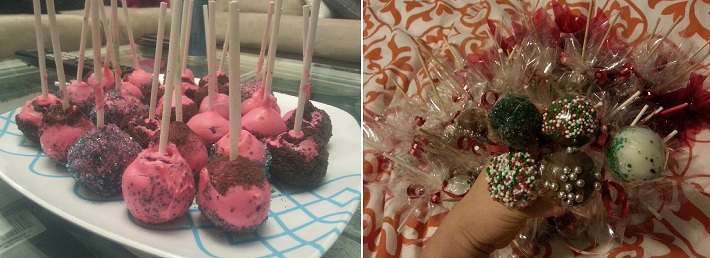
Step 8: Take the pops out of the freezer and dip each one into the chocolate until coated (you can let them warm up a bit or you might experience cracking chocolate). At this point I usually wiggly it around a bit (in the air over the pot) to get rid of extra chocolate and drips, etc. Once it looks like all the excess chocolate has gone and you’re left with a perfectly coated pop, add any decorations you want.
Step 9: To dry the pops stuff them stick first into styrofoam (or floral oasis) OR recently I discovered the little dividers in egg cartons work pretty well, too. Use your head on this one, COME ON! They take a couple minutes to dry completely before you can flip them on their heads and just put them back on a tray ’til you’re done decorating all of them.
Step 10: EAT A POP!

